Thursday 29 January 2015

1/35 AMT T-55 Update


The T-55 (more or less :D ) is finished along with 2 other scrapyard vehicles which will receive their own posts soon.
Over all I am very satisfied with the finished product for something which was entirely an experiment and would still recommend this kit despite its age as a much cheaper and worthy alternative to the Tamiya offering. These can often be found at shows for between £5-10 and make great test beds or stand alones :)


Friday 9 January 2015

1/35 AMT T-55

Hey guys,
Not very many good photos of this yet and there are still several projects Ive already completed to upload but I feel this is one of my better works.
I bought this kit in 2011 for £8 from Glasgow ModelFest, still new in bags despite being 24 years old :D
Anyway, I started the chassis around late 2013 simply for something to do. Whilst overall detail obviously isn't on par with what we are now used to, this is in no way a bad kit, turret texture, weld seams and many other crisp parts are present. However, I was put off by the low quality of the road wheels and resultantly, the project was shelved until December of 2014.
A specific photo (a truly excellent one at that) inspired me to make use of the neglected T-55. The pic, featured below, is dynamic and would give a chance to try out new techniques whilst simultaneously being 'original'.


I started off by deciding what features of the photo I wanted to carry through and which I was going to apply artistic license to :D I omitted the exhaust cover, splash board, 1 head light, 1 fuel drum, the commander's searchlight, 3 of 4 mud guards, 4 of 10 road wheels, all bar 1 fender stowage bow, 1 fuel tank and drilled out most filler caps.

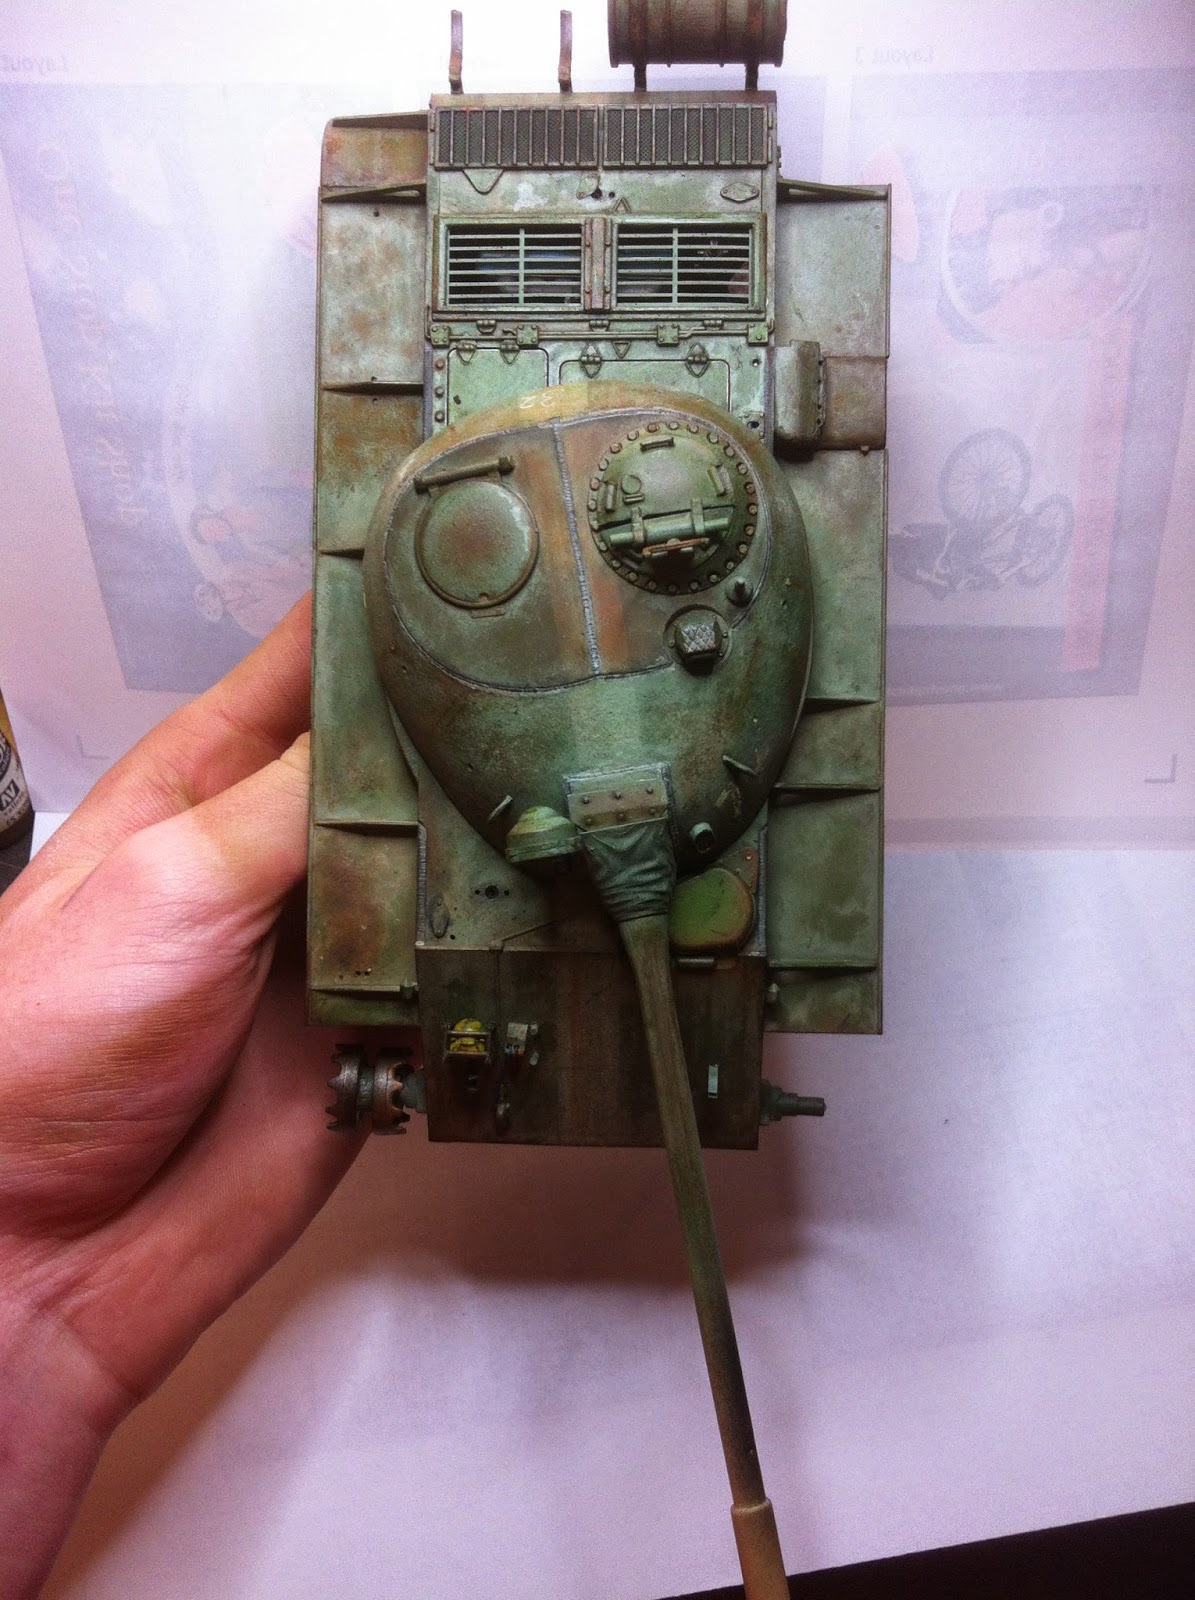
At this point, the tank was practically bare and I began to drill out the solid plastic engine deck vents in order to depict an engine compartment (albeit basic). A pin vice was used to drill dozens of tiny holes all the way around the edges of the vents before these were connected with a sharp blade causing the vents to come away. I then filed the internal edges and put a piece of etch from the Eduard T-28 set to represent the vents I had just removed. This was not an ideal solution and completely inaccurate but does allow a clear view into the engine compartment I had mustered using parts from the spares box and an old Trumpeter engine. (Not present in photos :D )


Once all sealed up, I primed the tank with Halfords Matt Black spray can and prepared for some Colour Modulation (Not very clear in my pics, as usual :D )
This began with shadows being done with Vallejo Russian Green, intermediate areas in Cam. Green and highlights using Olive Green.
By now, the fate of this kit was in question. I was leaning more toward a Russian scrap yard setting rather than replicating the fore mentioned picture. The tank was already in a state disrepair and so suited both, the latter now more appealing as I would prefer to do the photo justice at a later date with a better kit.
(Ignore the Panzer 2 :D )


A white stripe was drybrushed down the middle on the tank, hinting that before ending up in scrap, this vehicle took part in the 1968 Czech invasion. Small patches of brown and dark orange were airbrushed onto likely corrosion spots  before the entire model was given a coat of AK Worn Effects.
Panzer Aces Russian Highlights II was then misted over and given 10mins to dry before I began the chipping process. I focused on the likes of the turret roof, fenders and front glacis.
These areas were then enhanced with a piece of sponge and acrylic paint. New rust is typically brightish orange and lives on the edges of corrosion patches. As such,orange was applied first and on the largest scale, Slightly older rust, brown, would occupy the middle ground whilst the oldest and smallest section would be a dark brown. This formula helps create a sense of age and depth, a good base for further weathering.
1. Mask off part
 2. Sponge on orange (fresh rust) paint
 3. Sponge brown (worn rust) paint to a slightly lesser extent leaving orange at the edges
4. Sponge on black/brown (old rust) paint only on the edge. A graphite pencil can then be used to give a metallic shine to said edge.


(Sorry for poor photos again, looks far clearer in real life :D Test subject was a Trumpeter PT-76 which you may see in future ;) )


A subtle brown enamel wash was then used to blend the entire project together in preparation for more prominent rusting. The armoured plate around the turret rings was given a fresh hue by rubbing in orange oil paint with a stiff old brush. This process was also used on the exhaust and glacis edges.
AK rust washes were then used to stain certain areas a mild orange and highlight specifically corroded areas.


For the first time ever, I used acrylics for streaking (After reading Scratchmod Rob's fantastic PT-76 article in Military Modelcraft International). In my opinion, it worked reasonably well for a first attempt and their fast drying time allows layers to be built up quickly. However, paint consistancy, brush moistness and time left are all something which must be monitored closely and practiced in order to create realistic finish.


The fuel drum was chipped like the rest of the tank but the straps were masked off and given more attention, this helped make them stand out.


A final pin wash, light dust wash on small areas for contrast and light grey wash around the turret roof panel weld seam to depict the decaying lead weld were the final steps.
From base coat to finish, the project took around 16 days and has spurred me on to attempt more scarp yard vehicles. (Still need to glue the grab handles, wheels and stowage on :D :D )


Thursday 13 November 2014

1/35 Tamiya Char Bis


This truly is a brilliant kit, as would be expected of Tamiya. All parts fit perfectly together with no gaps that would need filler, as well as including a French Tank Crewman figure and set of fully workable tracks requiring absolutely zero cleanup save for tiny injection points on the links (Something which in my opinion doesnt need removed). I must admit that very little time or effort was put into the painting of this kit and was done as more of a side project. The mud is also, in my opinion, terrible and will hopefully receive some attention in the near future.

--------------------------------------------------------------------------------------------------------------------------

Once built, I started off with a priming of Halford's Matt Black followed by a base of Vallejo Russian Green. This set a tone upon which successive lighter layers would be visible.
These took the form of multiple variations on Panzer Aces XXXXXX to attain a highly faded look. However, some panels and a sprocket were given a coat of light sand to introduce a degree of contrast, adding to the eventual interest. This concluded air brushing for now and made way for the subsequent decals and weathering.

Decals were from a 1/72 Dutch aircraft and old dry rub set.

As usual, modulation was first up and was applied to all rivets, hinges etc. This, I feel, aids in creating a visually complex model fairly easily.

Chipping was nect and took the form of a lightened base colour filled in by dark brown/black. I find that thinning the paint a wee bit makes for easier and more controlled application at such a precise stage. (Chipping on the sprocket was done in a slightly less careful manner than the hull due to its impending reception of mud washes)


I next made up a pallet of oils on a piece or cardboard and left it for a few hours, this helps absorb linseed oil from the paint making for a more matt finish. Once prepared, I dabbed a stiff brush in the paint and drybrushed it onto a bit of kitchen role until leaving almost no marks. I then worked , quite firmly, in a circular motion on horizontal panel corners to build up a patch of filthy paint work. To my eye, this looks very pleasing and is simple enough that even I can do it :D


To create an equally dirty look on vertical surfaces, I used AK Interactive's Track Wash to provide a streaking effect on areas like the turret. This was followed by pin washes using thinned Van Gogh oils all round.


Black oils were the implemented to suggest a sooty/grimy appearance for the large vent (left hand side). This was the same technique used for creating dirty panel corners.


Some rust and oil streaks were also placed to offer ad aura of age. Abteilung oils were used for this and their application was simply just dotting and streaking down with a dampened brush.


Finally the exhausts. I didnt want these to simply be kit standard and so proceeded to fabricate an unual support for the right hand side where a section of fender is missing. The supplied shield was also replaced by a bent piece of metal foil allowing for realistic bending and damage.
The exhausts themselves were stippled with Games WorkShop's Liquid Green Stuff in order to simulate a rough, decaying texture. A base coat of orange acrylic was then followed by a dark orange oil wash. This set a rusty tone and made way for application of paint flecks yet to come off. I sponged/ painted on tiny patches of green paint to suggest these areas were yet to peel off.
The actual shield received the same treatment as the actual tank except with a greater emphasis on rust.


I will not go through the rigmarole of explaining my mud. I feel everyone has a method that works for them and am not entirely pleased with my outcome this time.
Anyway, hope you enjoyed this wee post. Have loads more coming soon :)


Sunday 7 September 2014

1/35 Zvezda/SP Designs 2S23 Nona SVK


I seem to apologising every post but again, sorry for the huge gaps. With exams now officially over and being back from France, hopefully regular posting will return.

This a model I actually completed a while ago now but hey ho.

Bought at Telford, the conversion only cost £6 whilst the doner chassis came from a BTR-80A kindly donated to me by a fellow club member. Construction was extremely straight forward and only took a matter of days with the resin upper hull mating to the chassis very well. Beside from a few wire handles, the instructions were followed making for a pleasant build.

Knowing of my project, another club member ( http://plasticpanzer.blogspot.co.uk/ ) generously gave me a turned Aluminium barrel. Unfortunately I was unable to use it due to either the SP Designs Nona turret or barrel being out of scale. The Aluminium barrel was far to thin but made for interesting comparison next to SPs resin version. (Luckily I have 4 more plastic Nonas to build so that barrel may well come in handy if I ever get around to building them :D :D )

Once construction was complete, a coat of Halford's black was applied followed by Vallejo Russian Green. From here I used cosecutive layers of gradually lighter greens until a gentle fade was achieved. In a moment of euphoria a cream camo was also applied using a mixture of Vallejo Light Sand and Dunklegelb. Bluetac sausages were used to create the patches. This was then followed by a thin, hand painted black outline was done around the cream. I understand that this imaginary camo may well infuriate those perfectionists amongst you but I model for myself, not for history. If you dont like artistic licence, youll hate my blog :D :D :D :D

Perisocpes and sights were done using Games Workshop Ice Blue followed by a wash of dark blue and coat of gloss. Other details such as wires and crew graffiti were then painted on using a range of bright acrylics. Various bolt heads etc received a lighter coat of green to introduce further contrast. As for decals, I chose Soviet Naval Infantry. Whilst Im alsmost certain they were never in service with this branch of the military, they are however thought to be employed by the Russian Navy. With this information coupled with my immense soft spot for the Soviet Naval Infantry, a decal from one of the Bison decal sets was applied to the turret side :)

Anyway, to commence weathering a preliminary wash of Van Gogh Burnt Umber and Abteilung Black. Once dry, streaks of AK Track Wash and Dust Effects was used to build up the heavily worn image which was then emphasised by chipping with light green and black/brown acrylics. In conjunction with hand painted chips, thinned colours were also flicked onto the hull using a brush to create minute texture defects. With these coats of enamels dry, a rag dampened in white spirit was used to wipe hatch tops clean of this 'dirt' in order to give contrast and insinuate use.
The horizontal surface just forward of the engine deck was covered with various pigments suggesting dust build up and made for a change in weathering technique. the engine deck itself was then dotted with small patched of spilled 'oil' as well as spills dribbling down the sides of the hull.Exhausts were done using a variety of rust tones and oils to help represent large mileage
Tyre weathering/mud take the form of polyfilla mixed with pigments. Once mixed into a past, it was spattered onto the hull and worked into the tyre tread. Dried, it was then wiped from the highlights of the tyres leaving it only in the recesses before being given copious enamel washes.
Sorry for this article not being very 'in depth' :(